Led by the Vice President for Digital Strategy & CIO, IST comprises four key units that include Digital Learning & Campus Support, Enterprise Applications, Infrastructure & Security, and Advanced Research Computing Services (ARCS). Together, we work as one team to serve the technology needs of NJIT’s students, faculty, staff, and community. Our strategic imperatives and current initiatives are aligned with NJIT’s strategic plan and aim to provide modern solutions that help move NJIT forward.
Popular Services
Software
Download software for Windows, Linux, and MacOS computers.
Learn MorePassword Reset
Reset or manage your UCID password.
Learn MoreWireless Network
Access the wireless network throughout campus.
Learn MoreCanvas - Instructors
Browse the instructor Canvas tutorials.
Learn MoreCanvas - Students
Browse the student Canvas tutorials.
Learn MoreStudent Computers
Learn more about NJIT's student computer requirements.
Learn More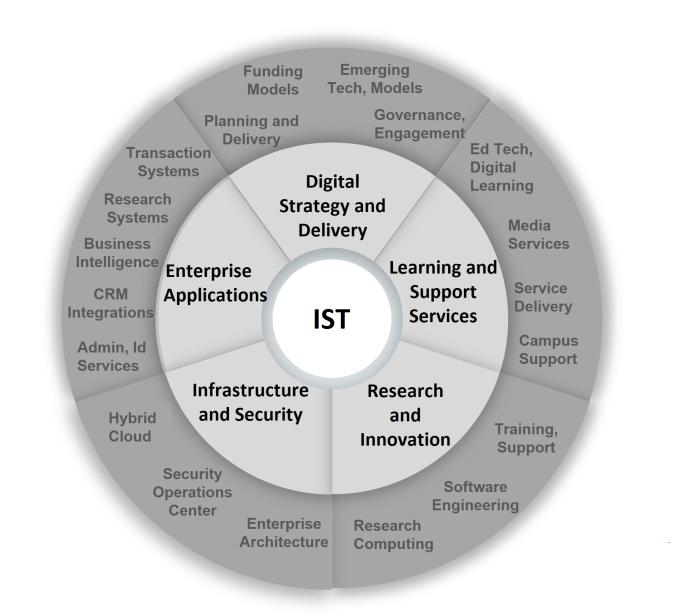
Strategy
The Information Services & Technologies (IST) Division developed an ambitious developed an ambitious strategy focused on enhancing the digital experience for our academic, research, and business partners: